This tutorial explains how to restore a free sample database to SQL Server using SQL Server Management Studio (SSMS). We will be using the AdventureWorks database, which represents a fictitious global manufacturing company that produces cycling equipment and accessories. This database is originally published by Microsoft and ideal for beginner data analysts who want to practice their SQL skills for data analysis.
Let’s get started!
Table of Contents
Prerequisites
A prerequisite for this tutorial is to have Microsoft SQL Server and SQL Server Management Studio (SSMS) installed on your machine. Check out my previous post to quickly learn how to set up a free edition.
Step 1. Download AdventureWorks Database
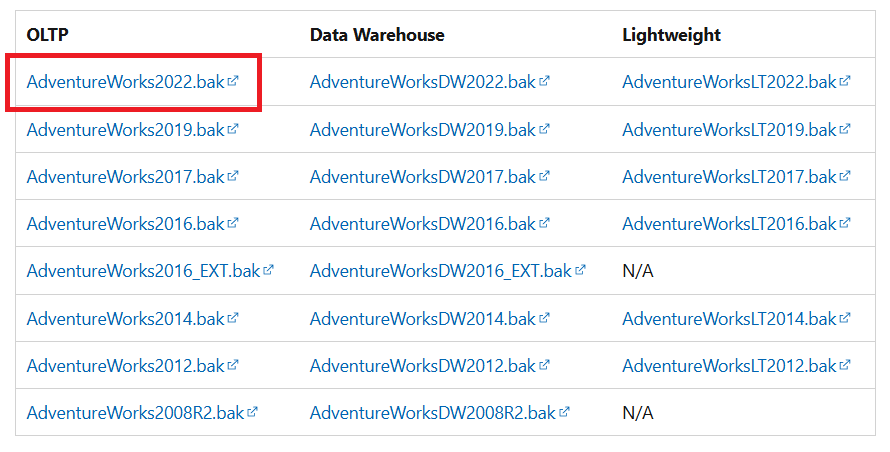
The first step is to download the AdventureWorks database from the official Microsoft website. Navigate to the AdventureWorks sample databases page and scroll down to the “Download backup files” section. There are multiple versions available. For this tutorial, download the latest online transaction processing (OLTP) version, which in our case is “AdventureWorks2022.bak”.
Move the downloaded .bak file to your SQL Server backup location. This location varies depending on your installation path, instance name, and version of SQL Server. The default location for a default instance of SQL Server 2022 (16.x) is:

Step 2. Restore AdventureWorks Database to SQL Server
Now that you have downloaded the AdventureWorks database and moved it to your SQL Server backup location, it’s time to open SQL Server Management Studio (SSMS). Launch the app from the Start Menu and connect to your SQL Server instance. If you are unsure what to do, be sure to check out my previous post.
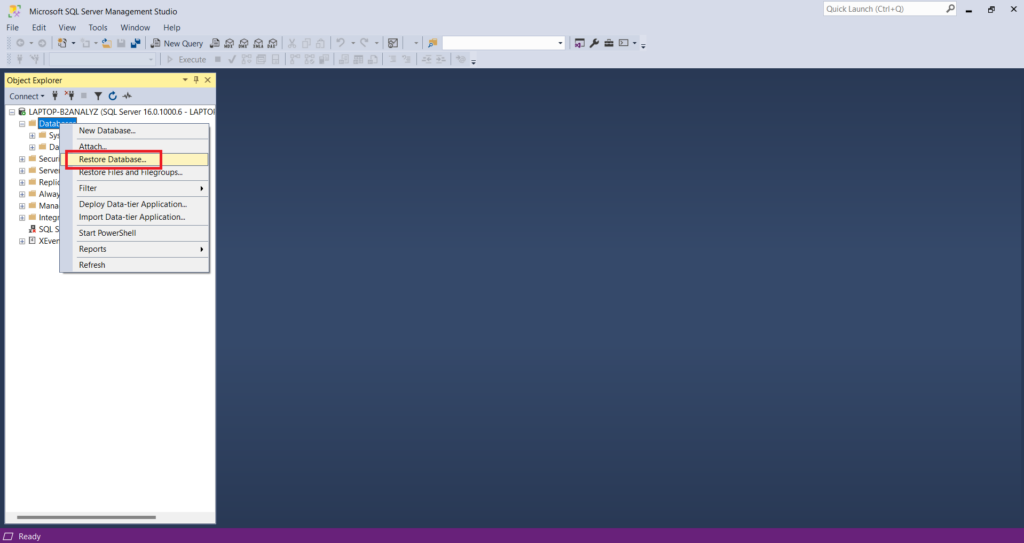
Within SQL Server Management Studio, navigate to the Object Explorer on the left-hand side. Right-click on “Databases” and select “Restore Database”. This will open the Restore Database wizard.
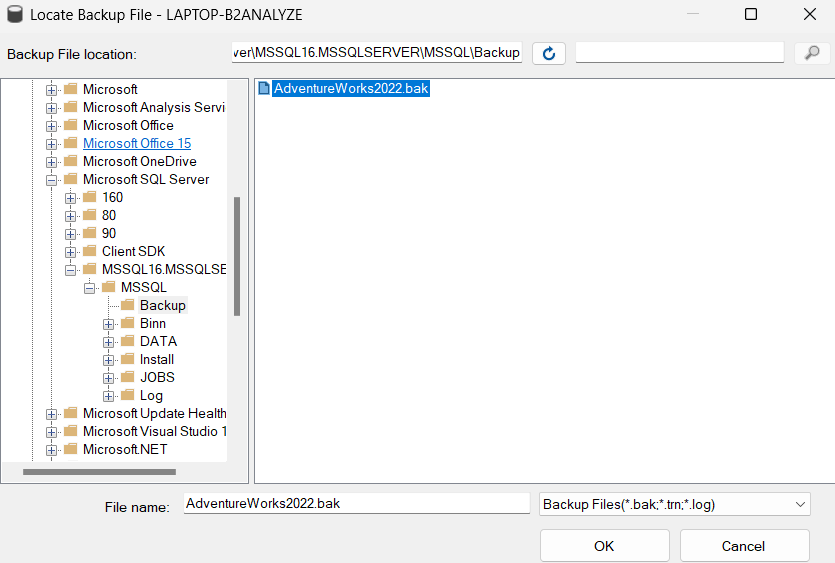
Within the Restore Database wizard, select “Device” and click on the three dots (…) next to it. Then click on “Add” and select the downloaded AdventureWorks file.
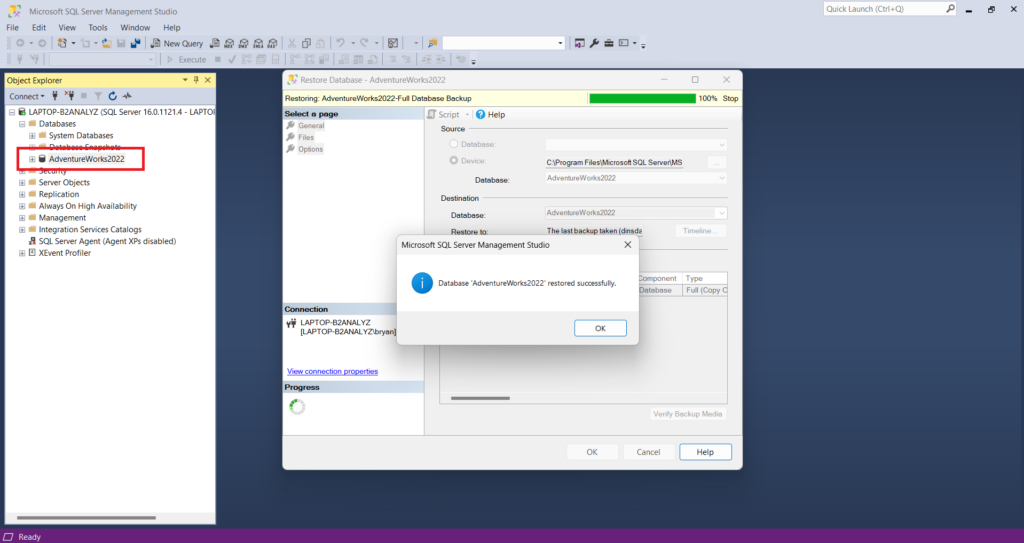
From the above screenshot, click “OK” and click “OK” again to confirm the backup file location. This brings you back to the main Restore Database prompt. Click “OK” one more time to restore the database to your SQL Server instance. Once complete, the AdventureWorks database will be available in the Object Explorer.
That’s it! You have successfully restored the Adventureworks database to your SQL Server instance. In the next tutorial, you will learn how to explore it by writing SQL queries.